I've been thinking about getting an estate car for a while now. But i don't like any of the modern cars around (far too many electronics to go wrong)
I quite like Omega's but couldn't find a low mileage one in my price range.
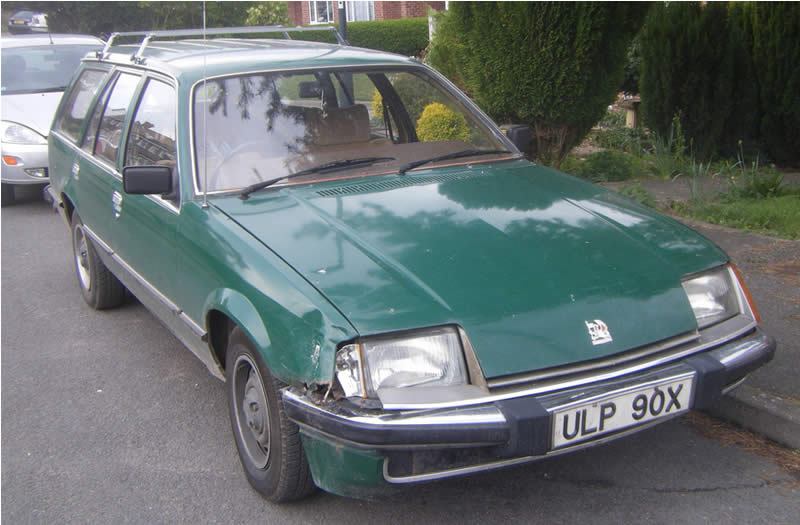
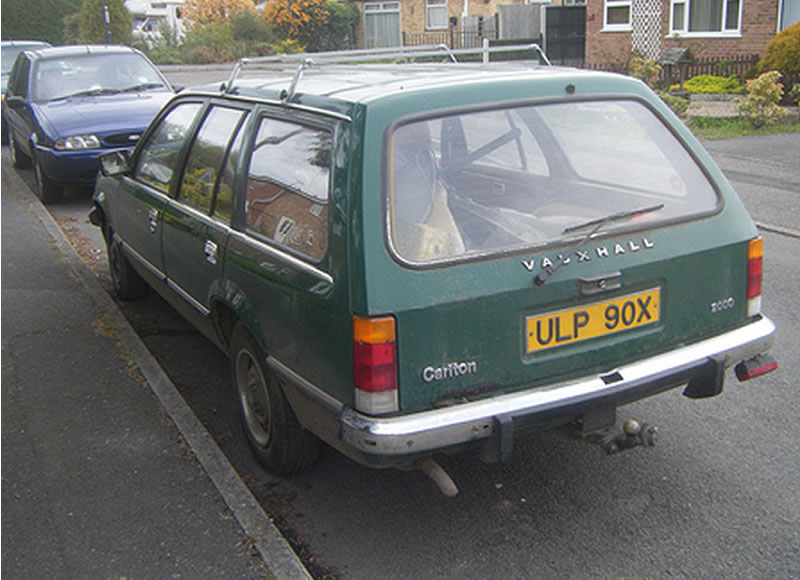
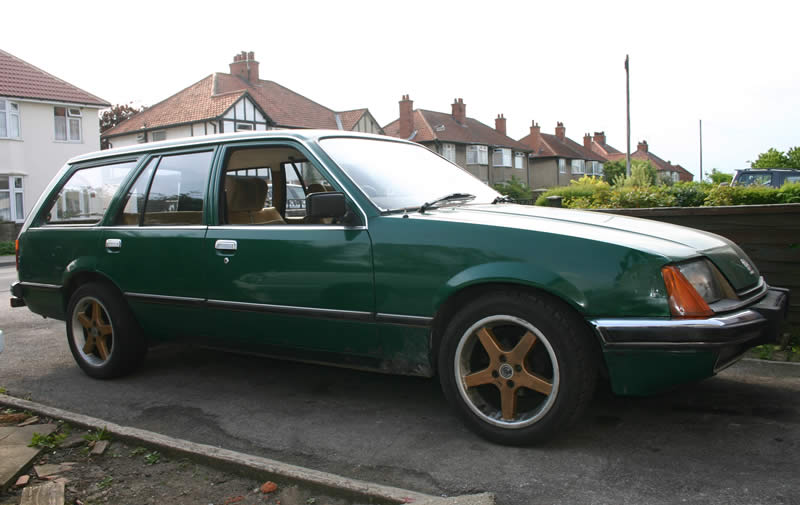
So when i spotted this Carlton estate for sale over on the Retro-Rides forum it looked ideal.
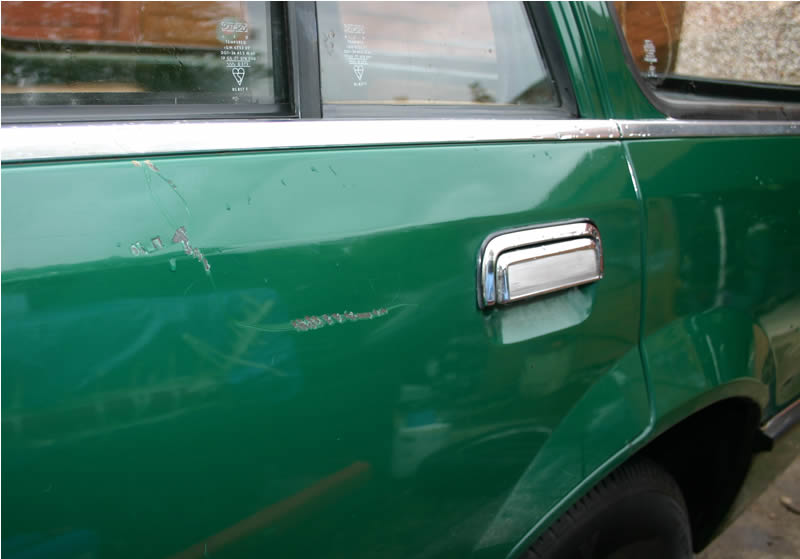
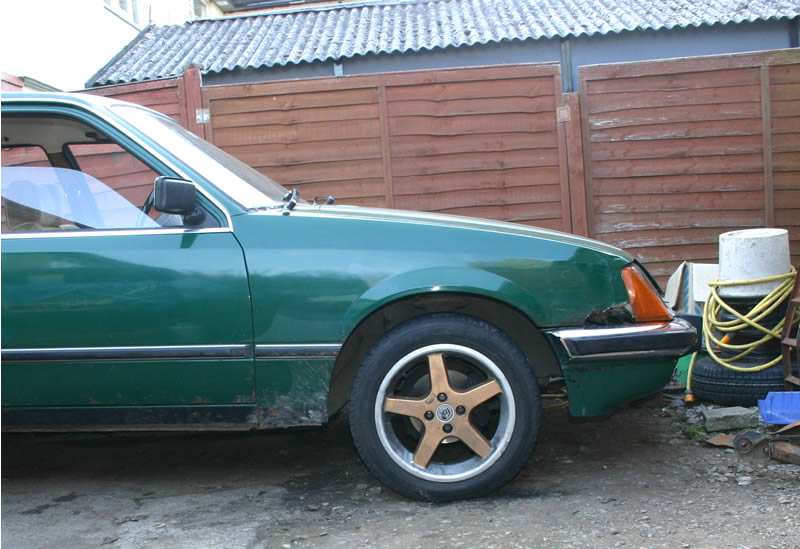
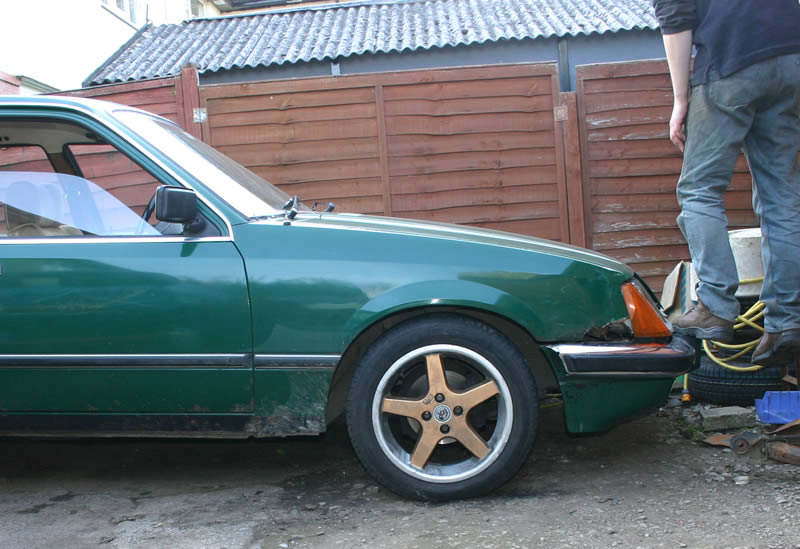
She'd recently had a small bump on the front corner, and the rear bumper had also had a small knock in the past.
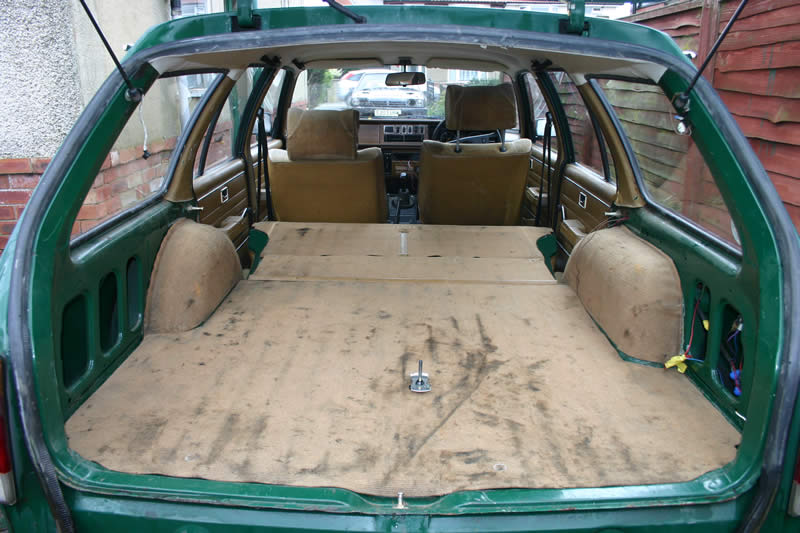
The engine and clutch were a bit tired and the interior needed a clean. But the price was right so i went for a look.

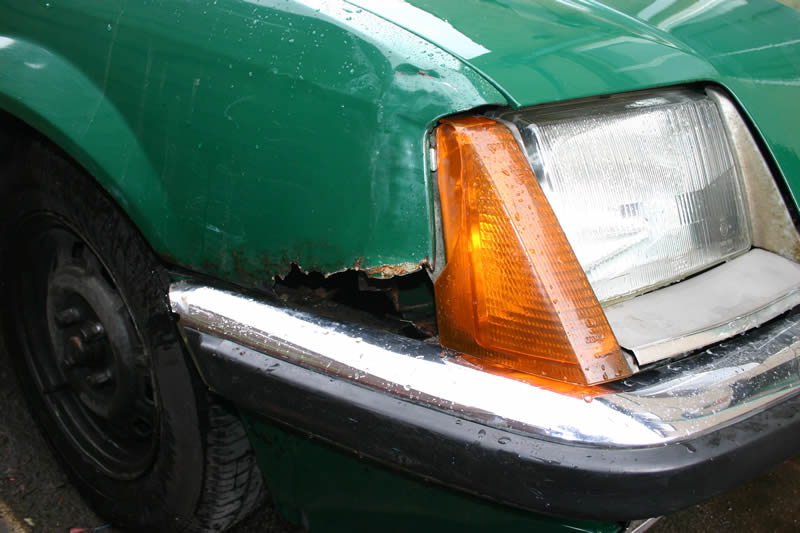
The wing is missing a small bit where the rust had weakened it before the bump. So i will prob need to get a replacement wing from somewhere.
Luckily the car came with 2 spare front indicators
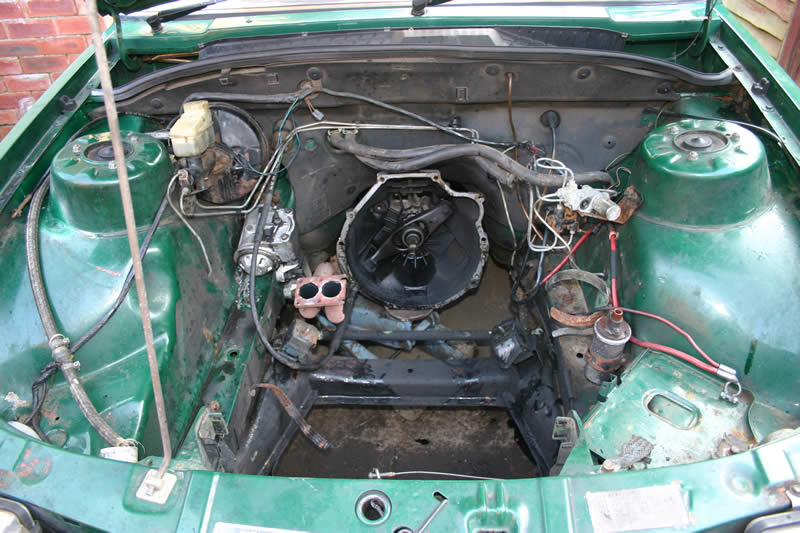
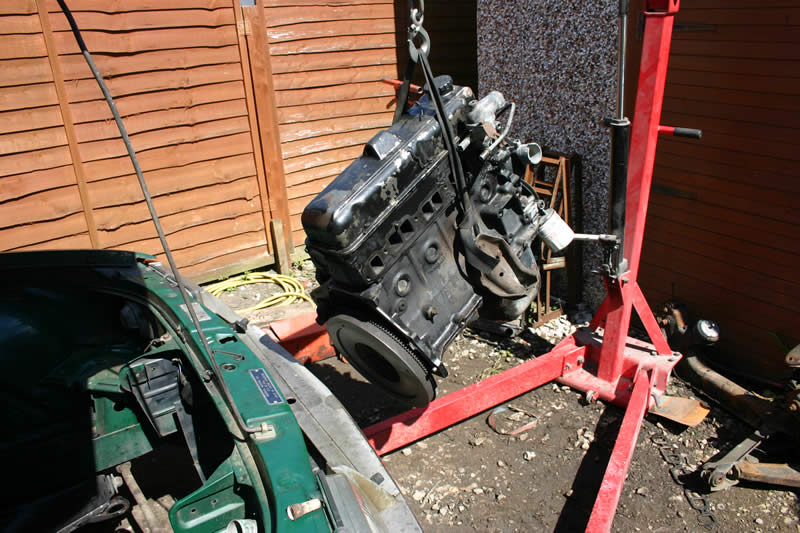
Under the bonnet sits a 2.0 CIH engine and 5 speed getrag box same as the manta's had.
Doubt that will stay long but not sure what it will be replaced with yet.
Looking at the space in the engine bay it may not be a inline 4 cylinder, but we will have to see.


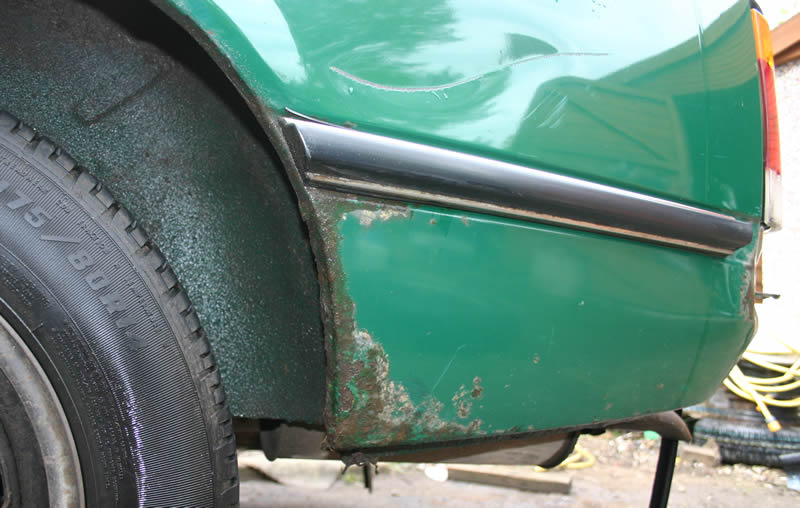
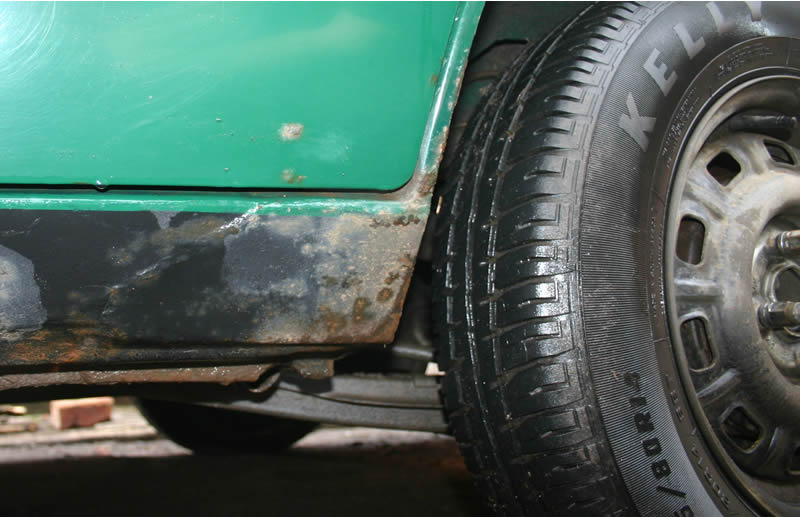
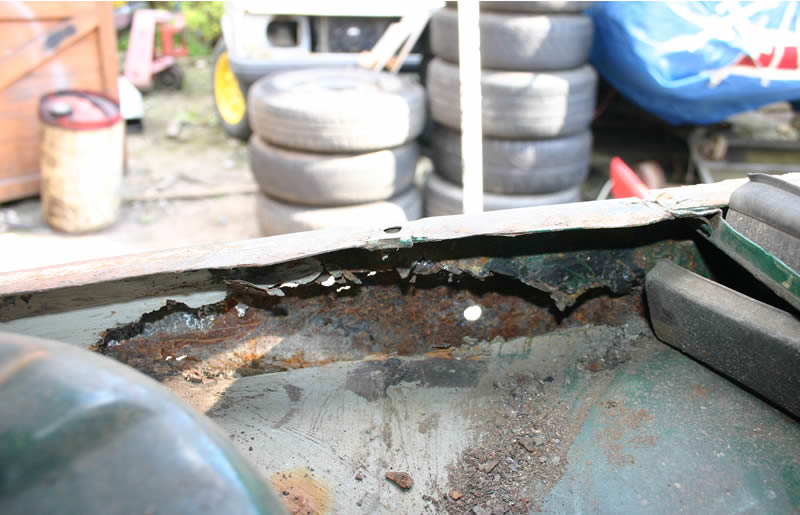
The paintwork has several blemishes. The worst being the tailgate which has rust pushing through the paint all over.
The NSR door and 1/4 have dents and scrape marks. Plus the lower arch has bad surface rot.
The roof is also starting to have rust push through the paint.

Decided to try one of my spare 16" Compomotive alloys on.
Well thats way too high
Cleaning up the hole where the rear seatbelt bolt went.
Not that the car has rear seatbelts fitted!
The rear lower arch also had filler in same as the sill.
Shame the metal it was covering was rusting still.


After cleaning out the rust new piece of arch being offered up.
Its actually a bit of manta arch panel left over from a previous repair.
Everything welded up and treated with rust inhibitor.
Will re-shape the arch with some filler and flick a little paint over it when everything else is finished.
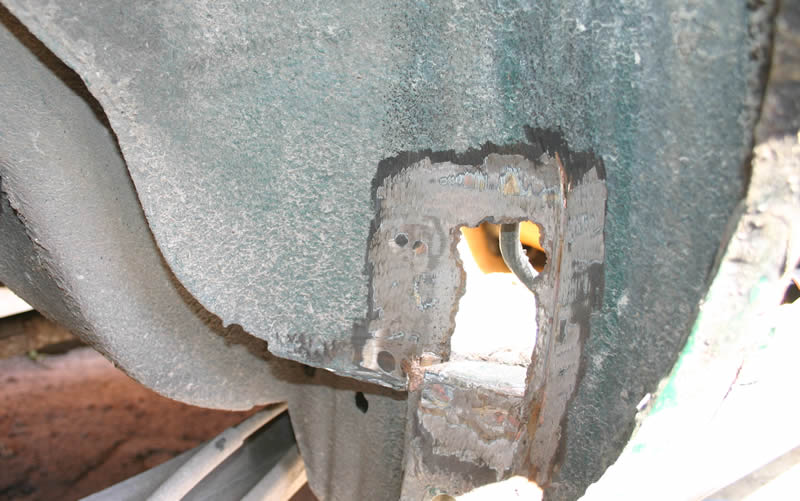
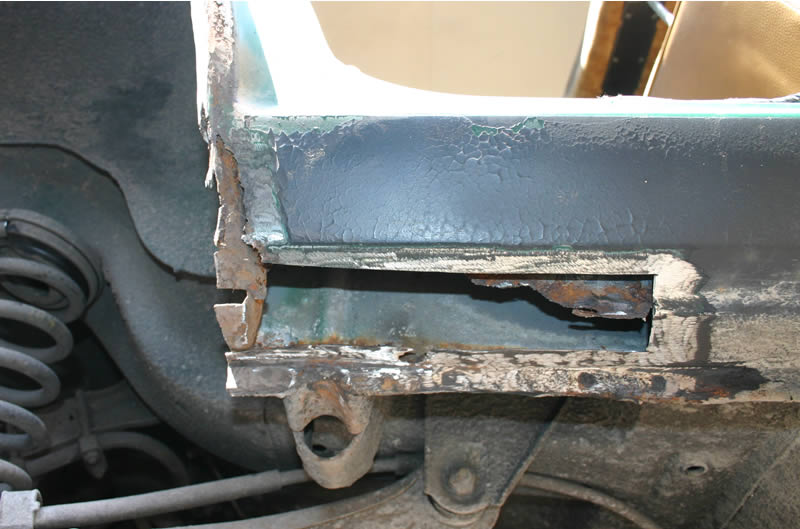
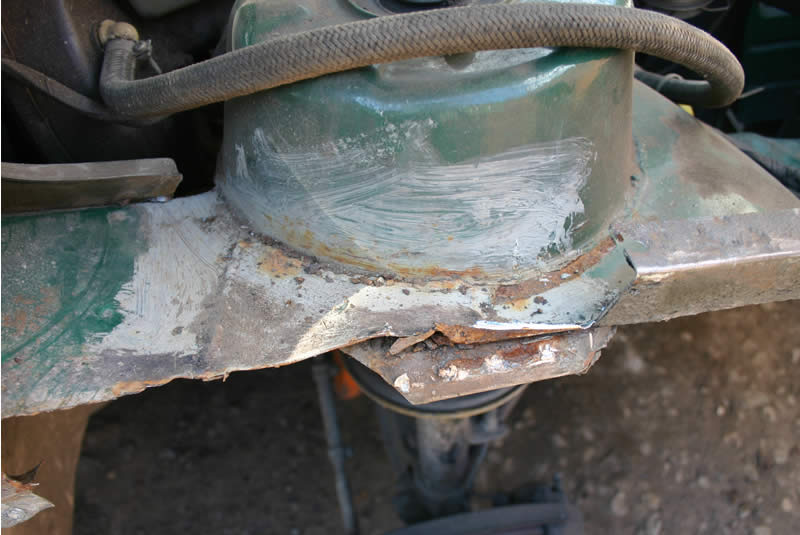
There had been a repair to the OS inner wing/ strut tower area that didn't look brilliant.
So i had a quick poke with a screwdriver and found big rusty holes around the patch!
So the patch needed to come off and the metal around it cut back to solid steel.The rusty area actually makes up the inside of the box section that gives all the strength to the suspension strut
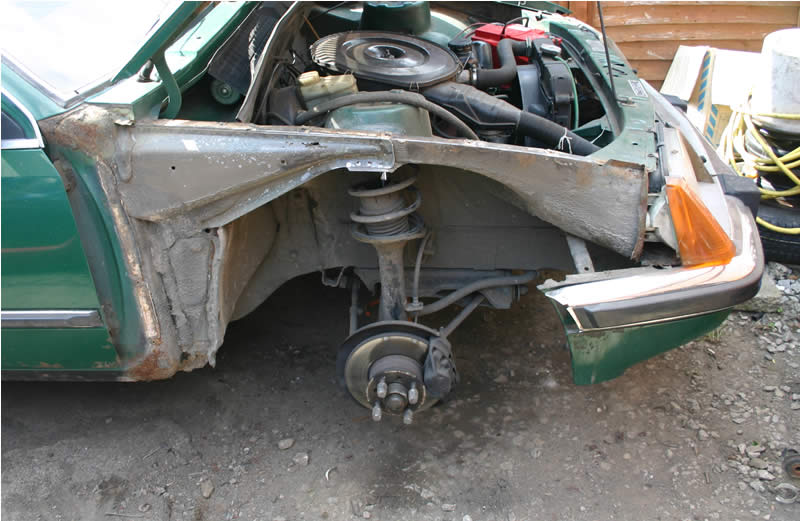
Next was to remove the wing to see what the outer part of the box section looked like.
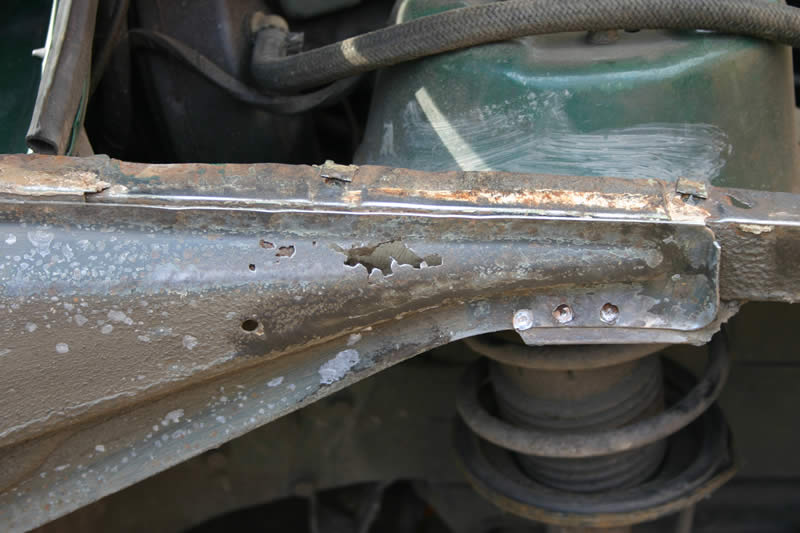
After a bit of wire brushing the outer was showing holes in one area (right behind the side of the previous patch)
So the strengthener needs repairing aswell, however there isn't any access to clean the inside of the box section up in-situ.
The only option is to remove the outer panel and rebuild the inner, then replace the outer strengthener.
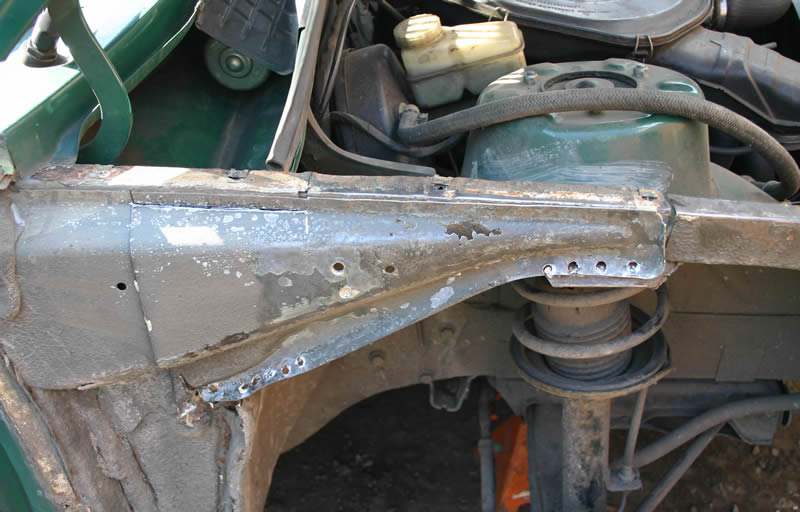
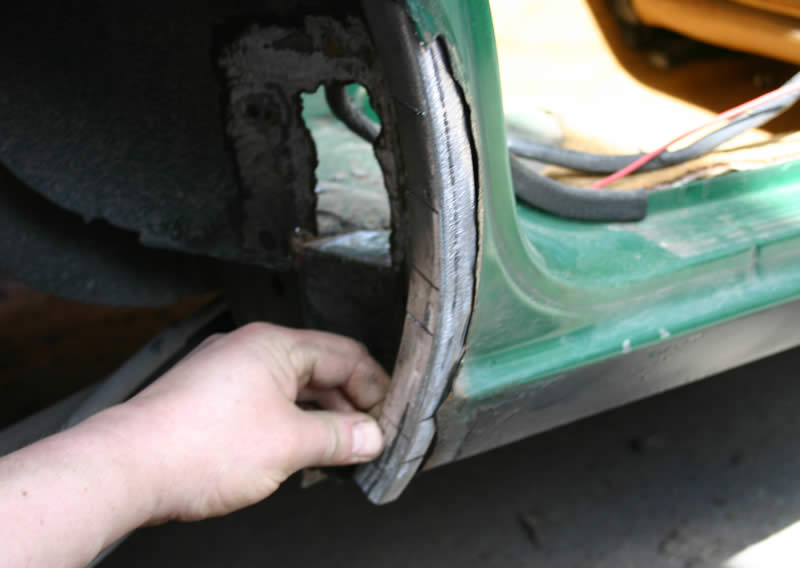
I drilled out the spot welds at the front end of the strengthening panel then sliced down through the back.
I left the rear part in place because it was seam welded on and also to retain some of the strength while repairing the inner wing
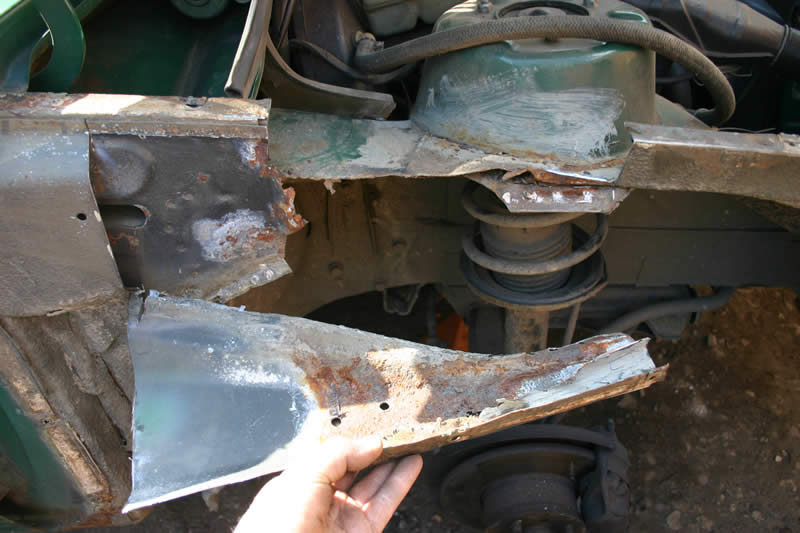
The old repair patch around the strut top can be seen here covering the original rusty metal.
So that was removed completely aswell.
I then bent up a new strut top, wing mounting rail section out of thick metal.
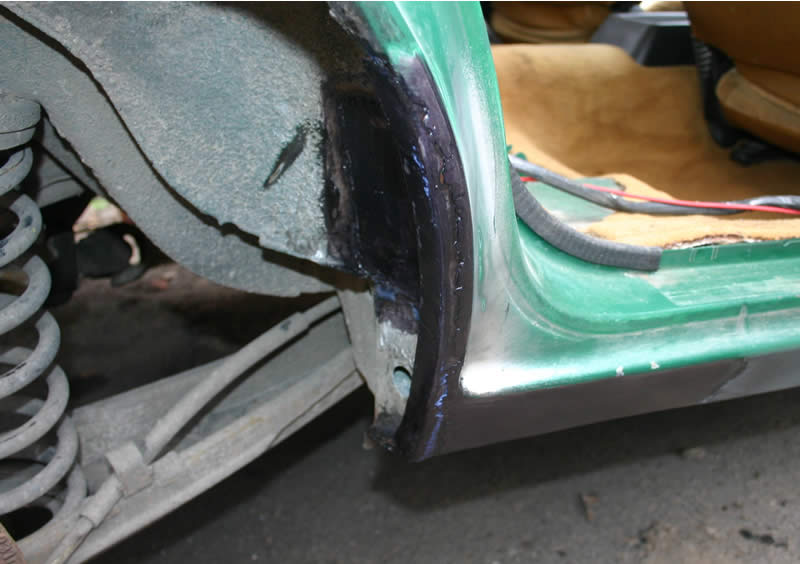
With the outer panel off i cleaned up the inside steel and chopped out the rusty bit and replaced that with fresh steel.
Then welded everything back in place.

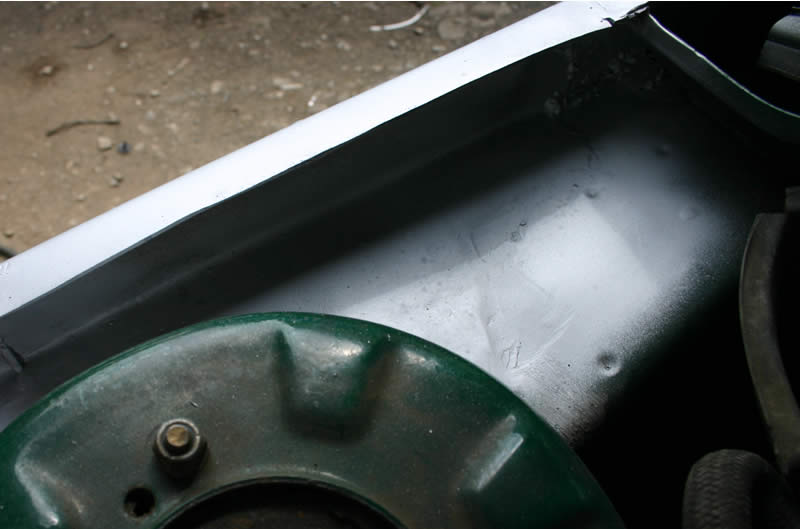
After a bit of grinding and a quick coat of primer the inner wing section looked like this.
Still need to drill the holes and fit the wing mounting clips.
As i need to MOT the car soon i decided to do a quick temp repair on the drivers front wing that had been damaged, as it had a sharpe edge..
So i bent up a bit of thin steel and tack welded it onto the back of the wing, a quick skim of filler and flick of paint and it looks much better.

After a single coil chopped off the rear she sits a lot better now.
Would like it a little lower all round, but will do for now.
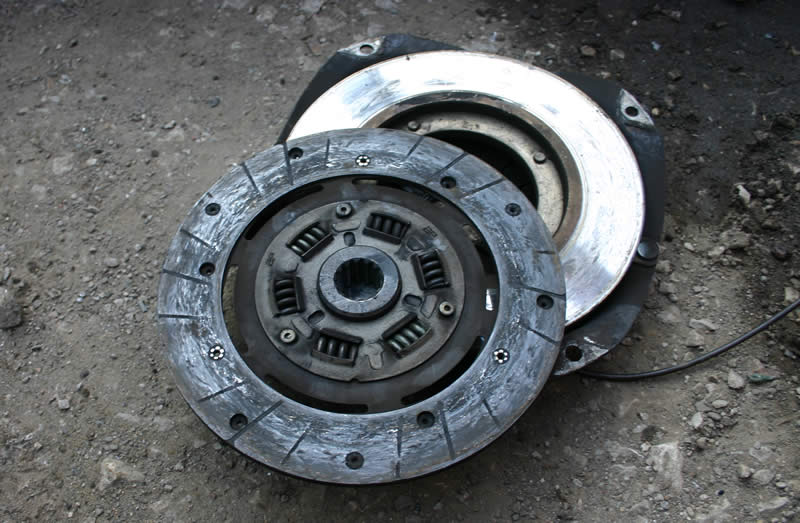
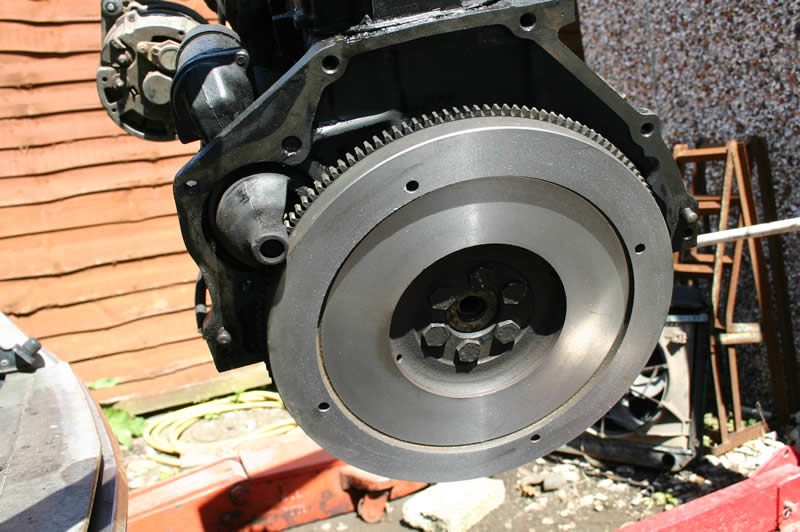
Old clutch out and its very very worn. The heads of the rivets were just starting to rub on the flywheel!
So flywheel is off to be skimmed and a new clutch fitted.
With the engine out of the way i managed to find the play in the steering. One of the balljoints on the centre tie bar had worn. So a replacement bar was sourced.
Once everything had arrived, the engine went back on hoist. Add a freshly skimmed flywheel plus new clutch disc and cover, and its ready to go back in.


There was some play in the front of suspension so i had a look at front tie-bar bushes.
They had looked ok from the side but when i removed the front washer things weren't so good.
So i went looking for a replacement bush, ideally i wanted a polyurethene version.
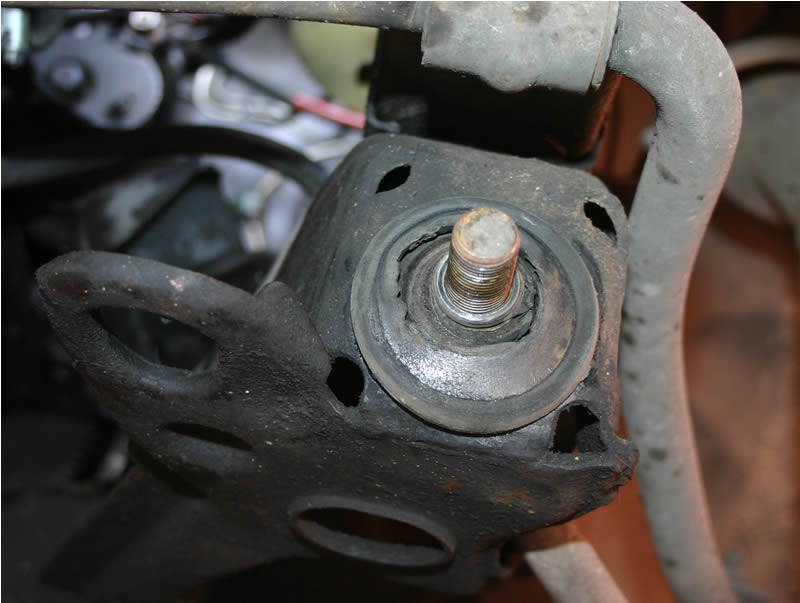

After a load of research i found mention that the Holden commodore VB/VC bushes were the same.
Fortunatly Superpro bushes list the required bush and have UK distributers.
Doesn't the new bush look so much better!
The steering is massivly improved and the horrible vagueness is almost completely gone.
Now sold